Configuring the Address Book
In order for guests to be able to select a host on the iLobby app, and for the hosts to be notified of a visitor, the iLobby Address Book needs to be populated with host (employee) profiles. You can add or edit profiles as necessary.

Each host's profile consists of the following information:
- the General tab shows contact information such as name, division, email address, mobile phone, desk number, etc.
- the Employee Pass tab shows the host's employee pass and their sign-in history for the last three months.


Clicking on Show All under the list of recent visitors will bring you to the Visitor tab where the records will be filtered by this host.
Adding Hosts to the Address Book
manually (most suited for implementations with relatively few hosts)
by creating and importing a file containing host information
by synchronization with your Active Directory
Adding Hosts Manually

Note: All fields except Contact Name and email address are optional. This procedure describes the significant fields.
1. Click New Contact.
2. Enter a Contact Name.
3. To create a placeholder for the host on the Who are you visiting screen of the tablet, which can be used as a shortcut by visitors when signing in, check Pin to ‘Host Selection’ screen
4. Optionally, enter the host's Division: this information is printed on the visitor's badge.
5. Enter all the necessary contact information (email, mobile phone, desk phone) and select which Notification methods should be used to notify the host of a visitor. Be sure that you have entered contact information for all the selected methods (for example, if you chose SMS notifications, be sure you enter a mobile number for the host).
Note: A host can have more than one email address and phone number in their address book record. The first email/phone number is considered the primary one.
6. Where appropriate, select a Personal Assistant. This is used for executives and/or other positions: the Personal Assistant receives a copy of notifications for the host.
7. To send a welcome email to the host, check Send Welcome Email.
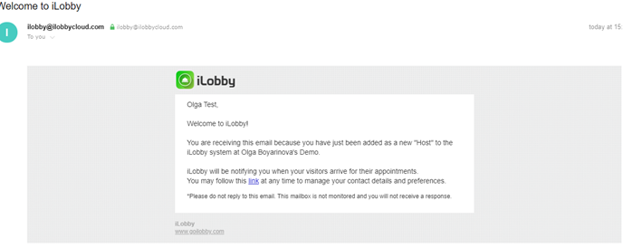
Sample Welcome Email
8. To add a photo to the host's profile, click the generic image, navigate to and select a photo and click Open.
9. Click Save.

New Contact Screen
Adding Hosts By Importing
To save time, you can create a comma-separated values file listing host information and import it to the Address Book.
Note: If the information for an existing host is not included in this file, that host will be removed from the Address Book. Supported file formats include .txt, .csv and .xlsx. (CSV or XLSX are recommended).
1) On the Address Book tab, click More and select Import.
2) Click Select files and navigate to the file containing host information. or click Download Sample File to download a sample CSV file,
which you can populate (the file is in a format supported by the portal and already contains correctly labeled columns).

3) Click Next.

Import Contacts Screen (Second)
4) By default, Column names in the first data row is checked. Column names correspond to the appropriate field in the employee’s profile in the Address Book.
5) Set the Column Delimiter depending on your file format and click Next.
6) You can see the Map Columns screen, which shows two columns. Field names from the iLobby Address Book are on the left, column names in the first data row of the imported file are on the right. For each field, select either Do not import or the name of the column to be populated.

Import Contacts Screen (Third)
7) Click Next. If the file being imported does not contain information for a currently configured post, you are prompted to optionally select
Remove address book records that are not in this file. This will delete all the address book contacts currently set up that are not part of the imported file.
Note: This will not affect manually created contacts.
8) Click Next. The data in the file is imported to the Address Book, and the summary of the import is displayed, showing how many contacts were added, updated and deleted.

Synchronization with your Active Directory
This option allows you to sync your Active Directory with the iLobby Address Book. Refer to the Address Book Integration guide to find out more
Giving Hosts Access to Their Account
To give host access to their account, click More in their profile and select Invite user.

More Menu
When you click Save, the host is sent an invitation that includes login information for the portal.
This will give hosts access to the account where they will be able to view their own visitor logs and events.

Another way for hosts to create accounts is to visit portal.goilobby.com, enter the email address associated with their name in the Address Book, and click Help me Login!.

Deleting Hosts from Address Book
To delete a host from the Address Book, click on next to the host’s name, or click More in the host’s profile and select Delete. Deleted hosts will not be shown in the "Who are you visiting" screen, but visitor records for the host are retained.

Related Articles
Configuring Events
This feature allows hosts to invite guests, via email, to visit them at a specific site and at a specific time: this speeds up the sign-in process. You can configure events for either multiple guests or a single guest. Configuring Multi-Guest Event ...Configuring Permissions for User Roles
Permissions grant access to specific portal functions and are assigned to user roles. The role which provides users with the broadest permissions, including full access to account settings, billing information, visitors, devices, and users at all ...Configuring General Settings
1. Click , then Configuration, then the name of your configuration. 2. On the General tab, enter the Site Name: this is used in notifications sent to hosts; e.g., “You have a visitor waiting for you at <Site Name>.” 3. Select the Time Zone in which ...Address Book
This guide outlines the steps required to resolve the iLobby Address Book-related issues. Issue 1: Host from the Address Book cannot be found on the “Who are you visiting?” screen. Resolution time: Maximum 15 minutes. Assumptions: You have ...Address Book Integration
Scope and Purpose of this Document This document is created to outline possible ways of integrating the iLobby Address Book with various available Enterprise systems for the purpose of automation of data entry and maintenance. The goal is to keep ...