Configuring Events

Configuring Events

This feature allows hosts to invite guests, via email, to visit them at a specific site and at a specific time: this speeds up the sign-in process. You can configure events for either multiple guests or a single guest. 

Configuring Multi-Guest Event 

1. On the Events tab, click New, then Event. The Event Details page is loaded. Fill in the meeting details.


2. Enter the Event Name: this will be shown as the Title of the event in the emailed event invitation.
3. Select the Location where the event will take place.
4. Select the  Host of the event. The host is the organizer and will be notified when invitees register for the event.
5. Select the  Visitor Type of guests. This field is required.
6. Enter the Start time and End time for the event.  Alternatively, if the event lasts all day, click All Day Event

Note: QR codes issued for the event will be valid for the whole day.
7. If you'd like this event to repeat on a regular basis, to avoid recreating the same events multiple times, check the option Recurring Event.
8. Event name, Start and End time, host, site, and number of invited guests are shown on the page with the list of events under the Event tab.


To export the events list to CSV, click on More, then on Export to CSV.


9. If necessary, enter additional information that will be included in the emailed invitation, such as directions to the meeting site (enter in the Instructions for Guest field).
Please see the example below:


10. Select the earliest time visitors can sign in to the event on the kiosk under Allow Early Signin. By default, it is always set the 30 minutes prior to meeting start option. to change it, click in the field and select the time.


If a guest comes earlier, there will be a message on the kiosk “ No match found. Please proceed with standard sign-in”.
11. To email the host of this event a list of guests who attended the event, check Send 'Summary Report' to host when an event has concluded.
12. To not have hosts notified when guests sign in, check Suppress sign-in notifications.
13. Click Save Event.


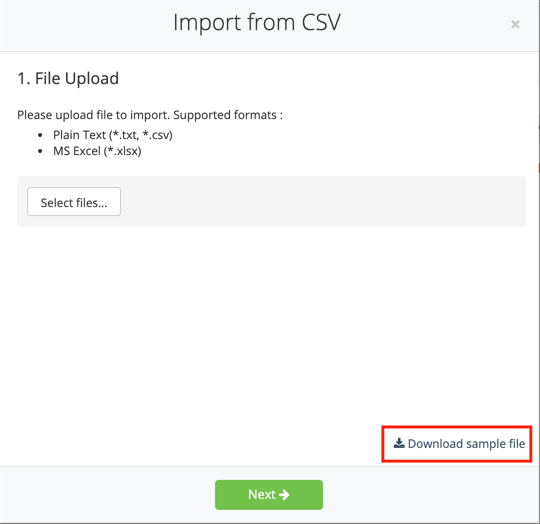
You can enter invited guest information individually or import a list from a CSV file.

Inviting Guests Individually

1) Click Invite by email.


2) Enter the email address of your guest.


3)Enter the guest's name and last name in the mandatory Name field.
4) Enter the guest's Company name.
5) The Visitor type defaults to that set for the event: if necessary, choose a different type.
6) Add notes to the event for internal purposes that will not be included in event invitation emails to guests in the Notes (Internal) box if needed.
7) If you have data fields defined in the sign-in flow on the How may I help you? screen for this visitor type, those fields can be completed: to display them, click More. This pre-fills the fields for guests signing in using the Pre-registered flow. 
8) Click Invite. An invitation email is sent immediately.  

Inviting Groups of Guests 

To invite a large group of guests, prepare a file (.txt, .csv or .xlsx) containing guest information (first name, last name, email address, and company name). Note that you can download a sample file for these purposes

1. Click  Import From CSV

2. When prompted, click Select files and upload the prepared file.
Note: The sample file can be downloaded by clicking on Download Sample File.


 Configuring Single-Guest Event 

1) On the Events tab, click New, then Invite Visitor or, on the Dashboard, click Register Visitor, then Invite Visitor.


2) Complete the provided fields and click Invite.


An event is created on the Events tab, with the name " Meeting with First name Last name", showing the name of the guest.  Invited/ pre-registered guests are listed in the dashboard's Expected today list.


Creating an Event using Outlook or Google Calendar


To create an event from your Outlook or Google Calendar, schedule your meeting and include invite@ilobby.com as one of the recipients. iLobby will automatically schedule the event in the backend portal and will send out iLobby invitations to all invitees. 


Note that in order for this feature to work, a sender must be part of the Address book.


Visitor Process


Once an event is created and visitors are invited, each visitor receives an invitation email with the details for the upcoming event, including place, time and date, along with a map to the location and a unique QR code. 


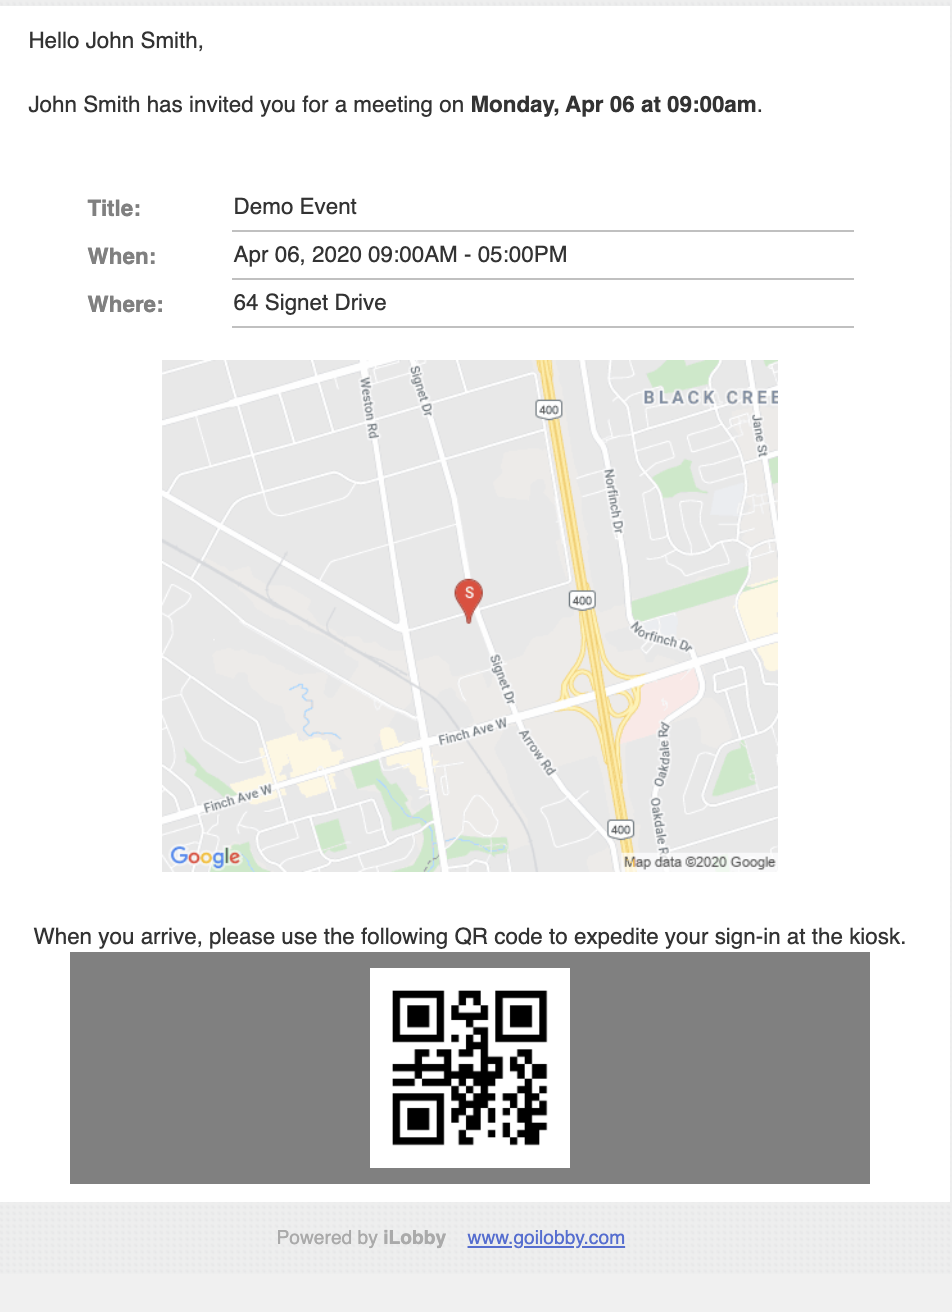
Upon arrival at the site, visitors can select the Pre-Registered option, allowing them to sign in by scanning the QR code from their cell phone or printed invitation using the device's front camera.


To find out more about the Pre-registered flow, see Pre-registered flow.


    • Related Articles

    • Configuring Recurring Events

      In case you have events that repeat on a regular basis, to avoid recreating the same events multiple times, you can make this event a recurring one. You can create a recurring event from scratch, or you can modify existing events.  Note: Please refer ...
    • Configuring Notifications

      The procedures in this article are accessed by clicking and then Configuration, then clicking the name of your configuration.   Use the Notifications tab to: set up automated notifications for system events (including who should receive them) ...
    • Configuring Personalization

      The procedures in this article are accessed by clicking and then Configuration, then clicking the name of your configuration.   Go to the Personalization tab to configure languages, visitor types, and data fields for the iLobby application.     ...
    • Configuring Permissions for User Roles

      Permissions grant access to specific portal functions and are assigned to user roles.   The role which provides users with the broadest permissions, including full access to account settings, billing information, visitors, devices, and users at all ...
    • Events

      Issue 1: When trying to scan an Event QR Code, there is a “Network Error” message.  Resolution time:  Maximum 5 minutes.  Assumptions: - For WiFi iPads, you know the Wi-Fi password for the network that the iPad is connected to.  - For Cellular iPads, ...